📄 Exam Questions & Readable Text Transcript
Full OCR-extracted text of questions, syllabus codes, and exam instructions.
Extracted Content: 4059q02
Page 1
Extracted Text
ZIMBABWE SCHOOL EXAMINATIONS COUNCILGeneral Certificate of Education Ordinary L evel
WOOD TECHNOLOGY AND DESIGN 4059/2
Paper 2 Practical Test
SPECIMEN PAPER 3 hours 10 minutes
Additional materials:
As listed in Instructions to Supervisors
TIME 3 hours 10 minutes
INSTRUCTIONS TO CANDIDATES
Please see page 2.
INFORMATION FOR CANDIDATES
All dimensions are in millimetres.
This specimen paper consists of 4 printed pages and an insert.
Copyright: Zimbabwe School Examinations Council, Specimen paper.
©ZIMSEC Specimen paper [Turn over
---
Page 2
Extracted Text
GENERAL NOTES* A second supply of wood is not allowed. If you make a mistake, do your best to work as near
to the dimensions of the drawing as possible. All pieces of wood should be finished to the
correct lengths and their ends neatly trimmed with a plane.
* You may use your discretion where dimensions are not given.
* You may use any of the ordinary hand tools and or machines, but do not use glue, glass paper,
files, rasps or scrapers.
*« Anunfinished piece of work, carefully done, may gain more marks than one that is completed
but is inaccurate and shows poor workmanship.
* Additional marks may be gained if the pencil marks are slightly cleaned off with a finely set
smoothing plane before being assembled.
* Write your name, centre number and candidate number boldly and clearly on each of the
pieces of wood in capital letters. Even if you do not complete the test, you must however,
return all the wood, with the exception of waste.
* Assemble your work and place it in a plastic bag before handing it to your invigilator.
PRACTICAL TEST
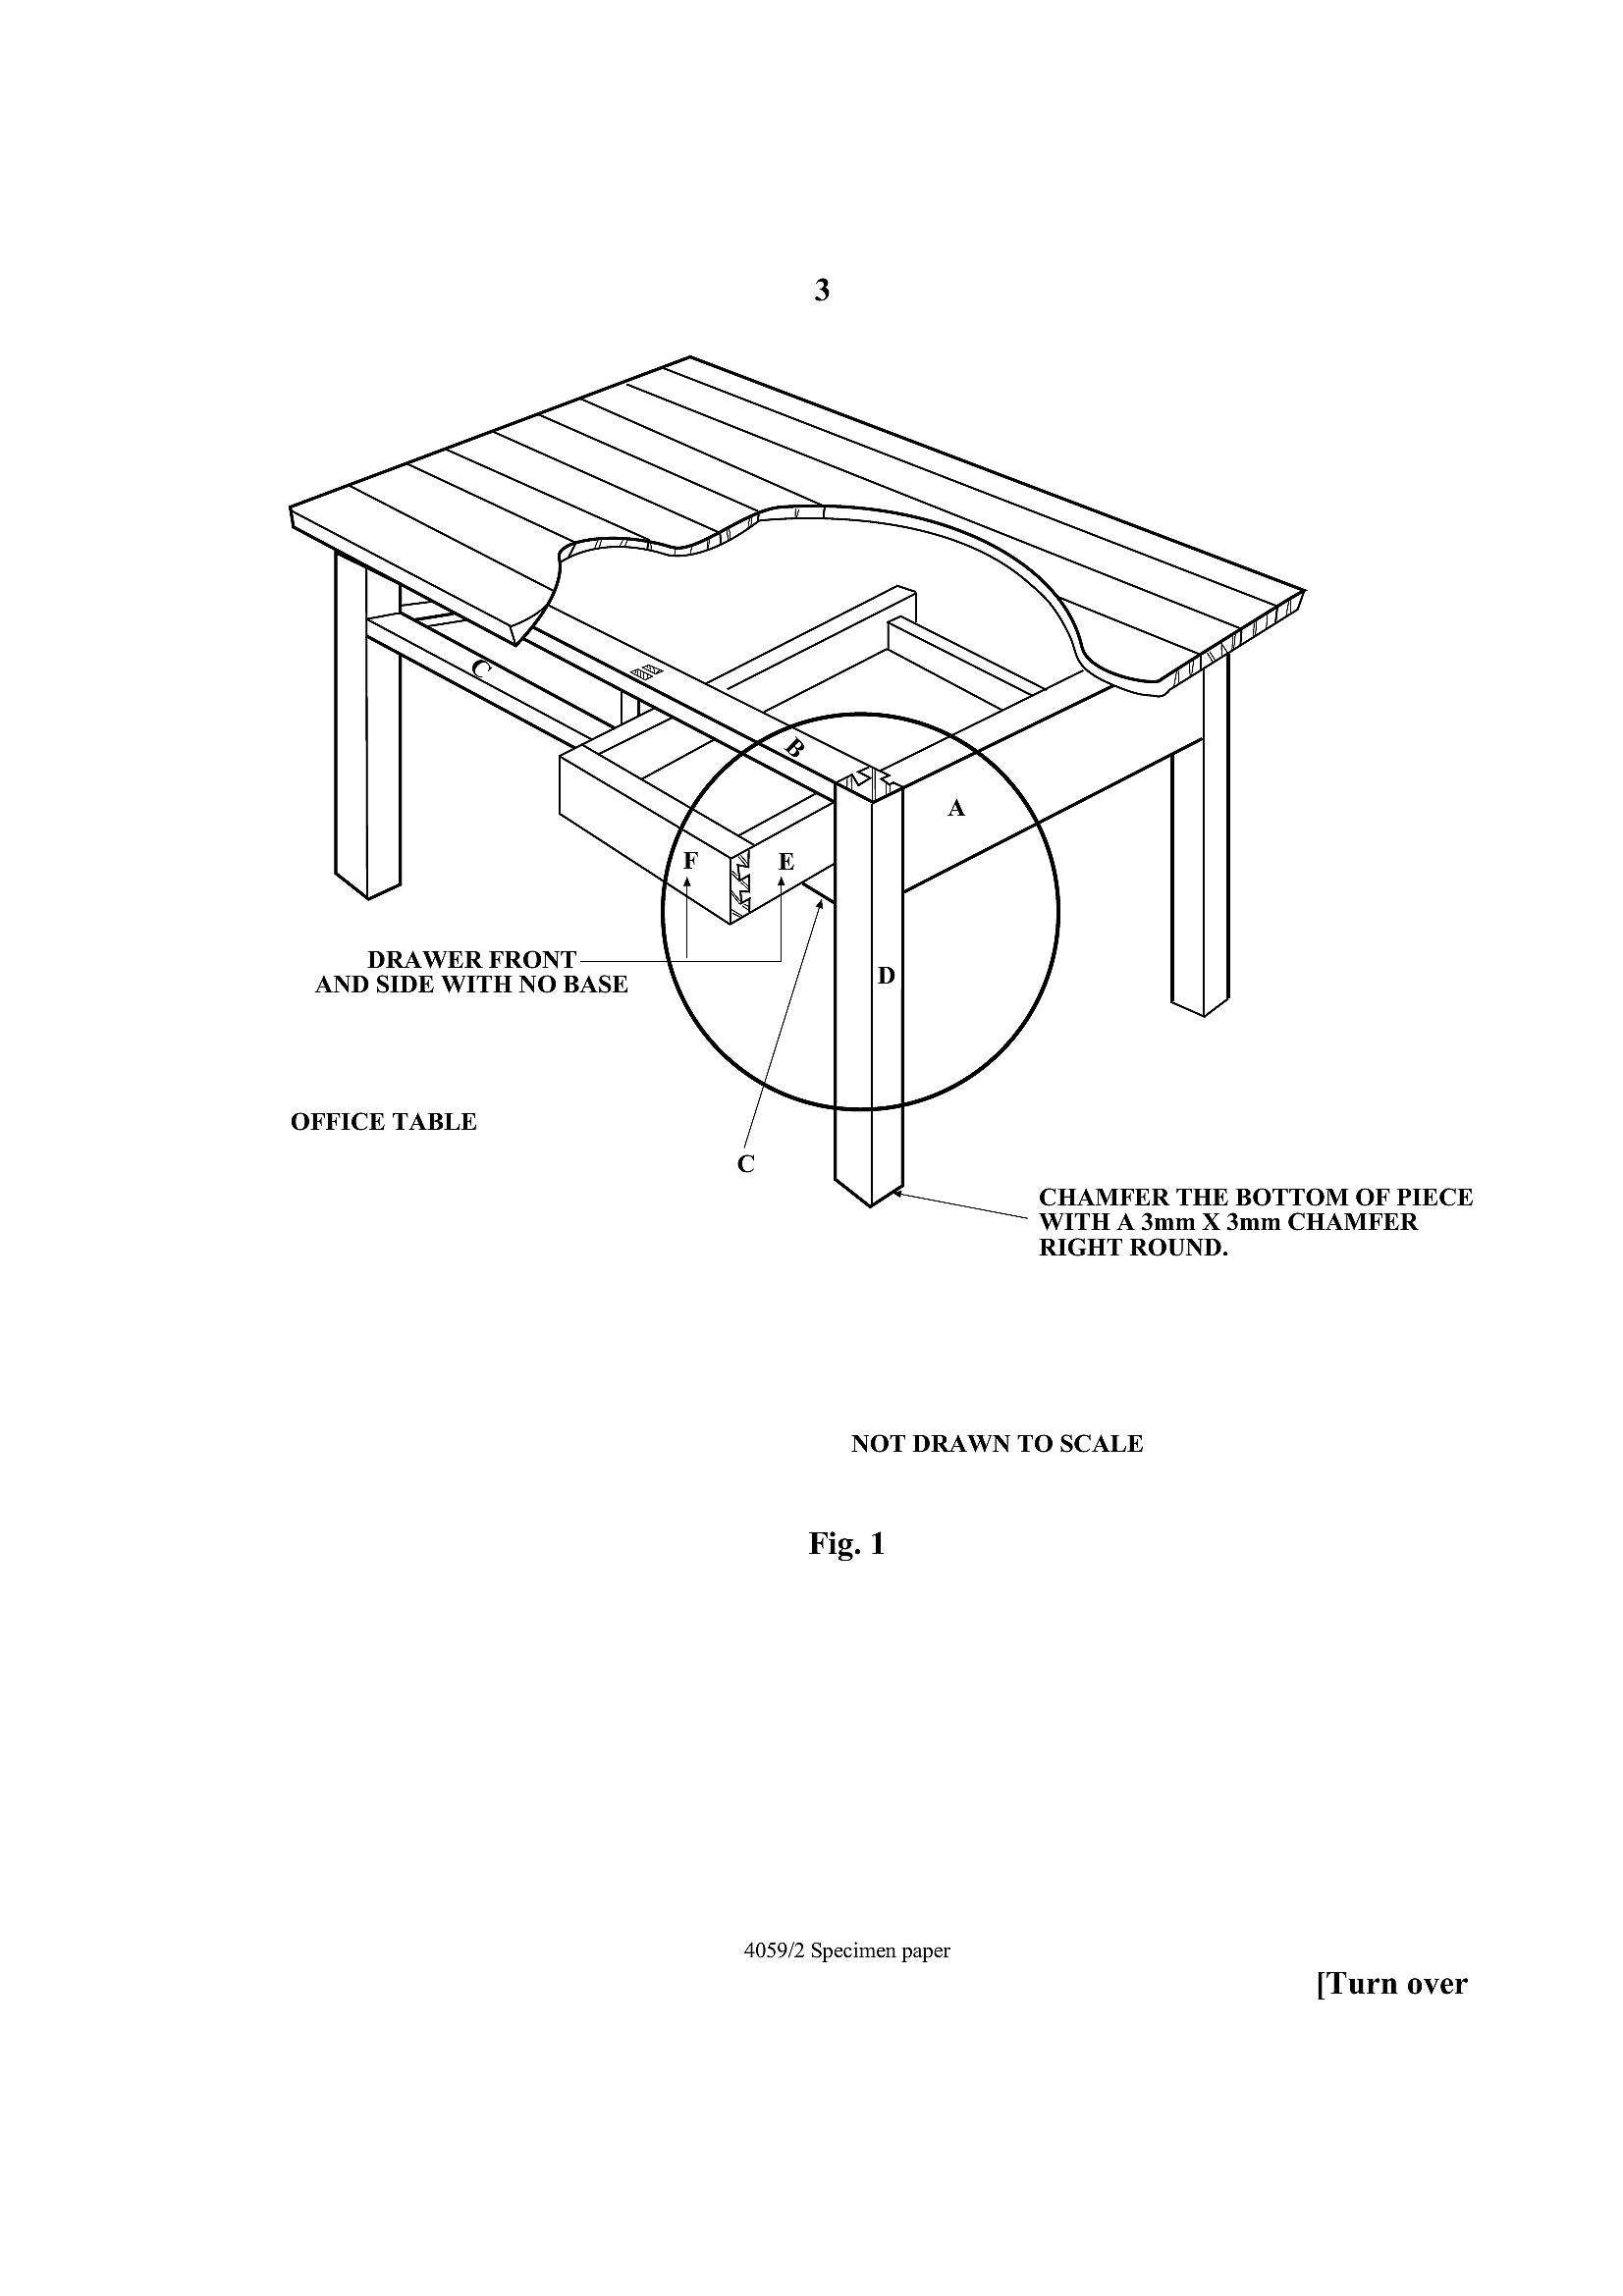
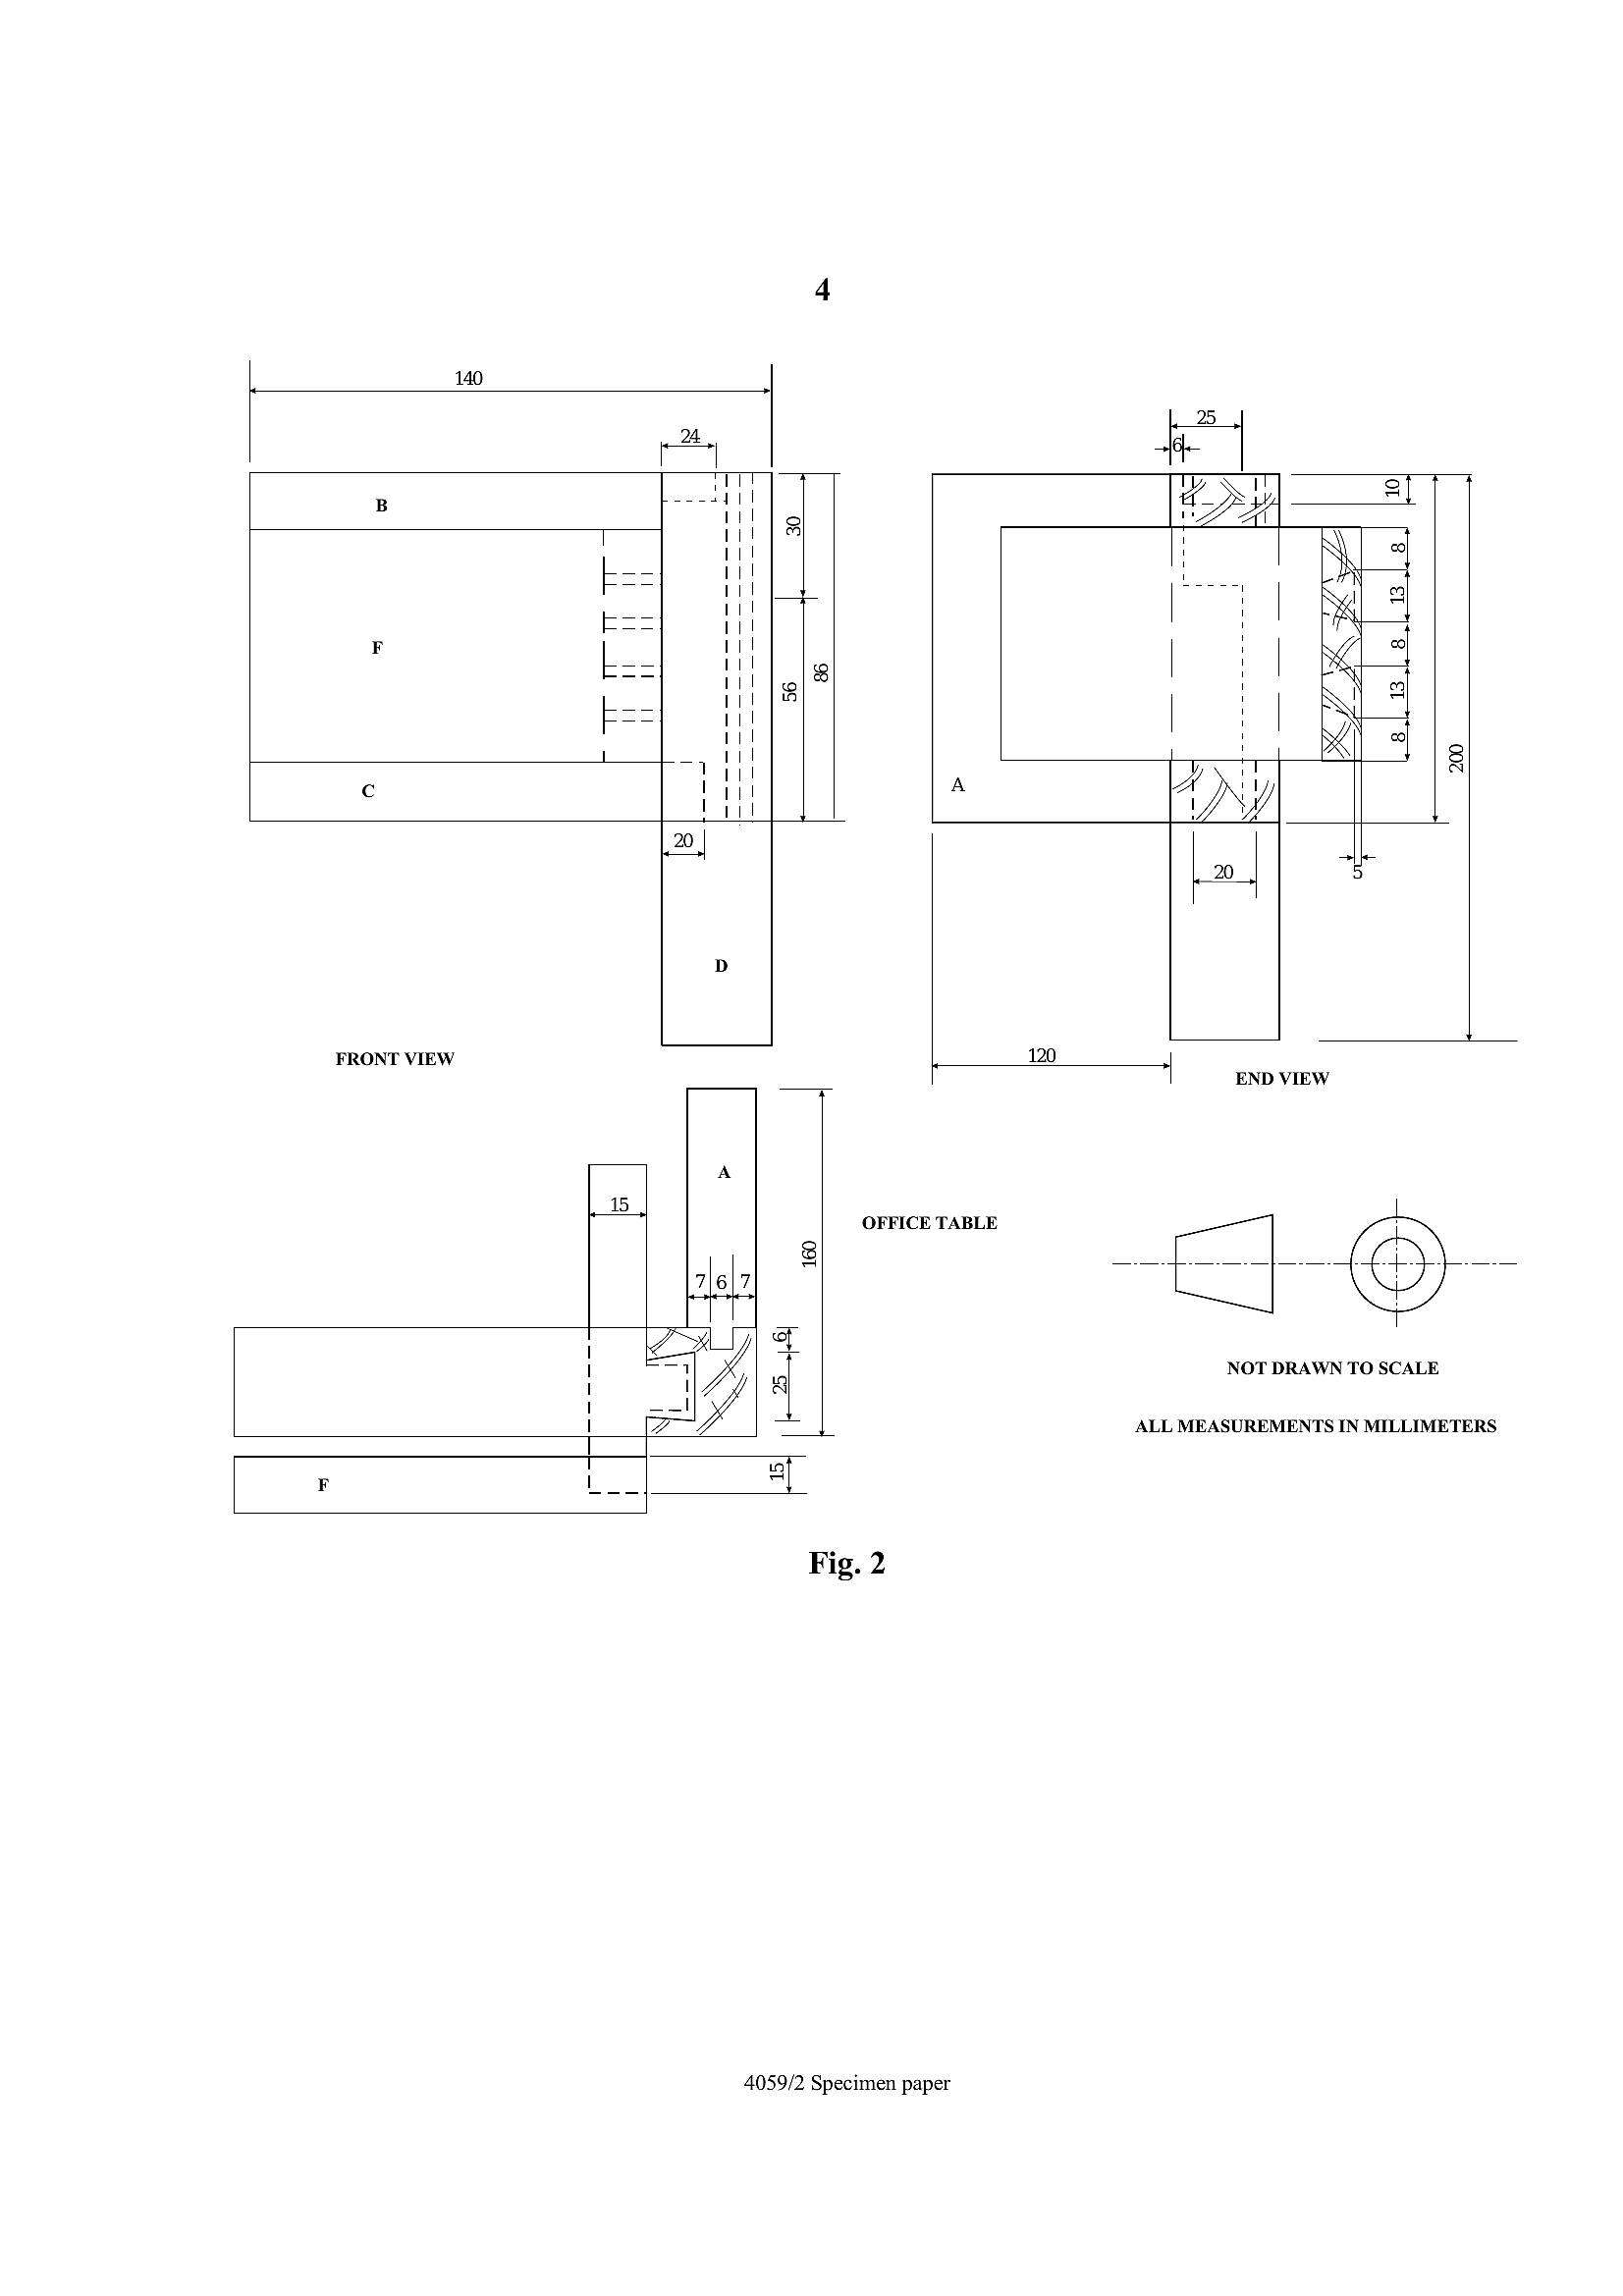
The pictorial drawing in Figure 1 shows details of an office table. Figure 2 shows the front
view, end view and plan of part of the table.
Y ou are required to:
Make the portion enclosed by the circle in Figure 1 and work from the sizes given in orthographic
projection in Figure 2 shown on the Inserts 1 and 2.
Chamfer the bottom piece A as instructed on Figure 1.
Use a dovetail slope of 1:7.
Any measurements omitted are left to your discretion.
The following pieces of wood previously prepared to size are to be used:
PieceA - 150 x 110 x 18
PieceB - 130 x 40 x 18
PieceC - 145 x 40 x 18
PieceD - 205 x 40 x 40
PieceE - 160 x 50x 15
PieceF - 145 x 50 x 20
ALL MEASUREMENTS ARE IN MILLIMETRES
4059/2 Specimen paper
---
Page 3
Extracted Text
DRAWER FRONT AND SIDE WITH NO BASEOFFICE TABLE
CHAMFER THE BOTTOM OF PIECE
WITH A 3mm X 3mm CHAMFER
RIGHT ROUND.
NOT DRAWN TO SCALE
Fig. 1
4059/2 Specimen paper
[Turn over
---
Page 4
Extracted Text
ol [ee ye yet ye 4ros
PY7
END VIEW
120
140
FRONT VIEW
OFFICE TABLE
NOT DRAWN TO SCALE
ALL MEASUREMENTS IN MILLIMETERS
OoL
ST
Fig. 2
4059/2 Specimen paper
---